Distributed ML Experiments on Databricks with Maggy
Learn how to train a ML model in a distributed fashion without reformatting our code on Databricks with Maggy, open source tool available on Hopsworks.
Introduction
Machine Learning is going to be distributed, as Andrew Ng calls it, Data-centric AI. Data volumes are constantly increasing, and models are known to improve their prediction accuracy predictably - so companies can often know what return they will get in terms of more accurate models by simply investing in collecting more training data. One of the main challenges for developers is to switch from programming for a single-machine to programming for a distributed cluster.
That's why we developed Maggy (maggy.ai), an open source Python library that introduces a new unified framework for writing core ML training logic as oblivious training functions. By encapsulating your training logic in a Python function (we call it an oblivious training function), the same code can be run unchanged in Python or PySpark. You don’t need to rewrite your code to do hyperparameter tuning, data-parallel training, or model-parallel training.
Maggy can be extremely useful in the case you want to build a distributed ML solution but you have no prior experience of distributed computing. It is enough to just refactor your training code to wrap it inside a function (this is good development practice, in case you didn’t know) and let Maggy do the distribution magic for you.
Furthermore, it is not important whether you use Tensorflow or PyTorch as Maggy supports both of them. Scikit-Learn and XGBoost are also supported, and are used, in particular, for parallelizing hyperparameter tuning over many workers.
Maggy on Databricks
In the following example, we use Maggy to train a Neural Network on the Iris dataset.
The first thing we have to do is to create a cluster on your Databricks workspace. Maggy has been tested on the Databricks Runtime version 7.4 ML. Choose the number of workers you need and you are good to go.
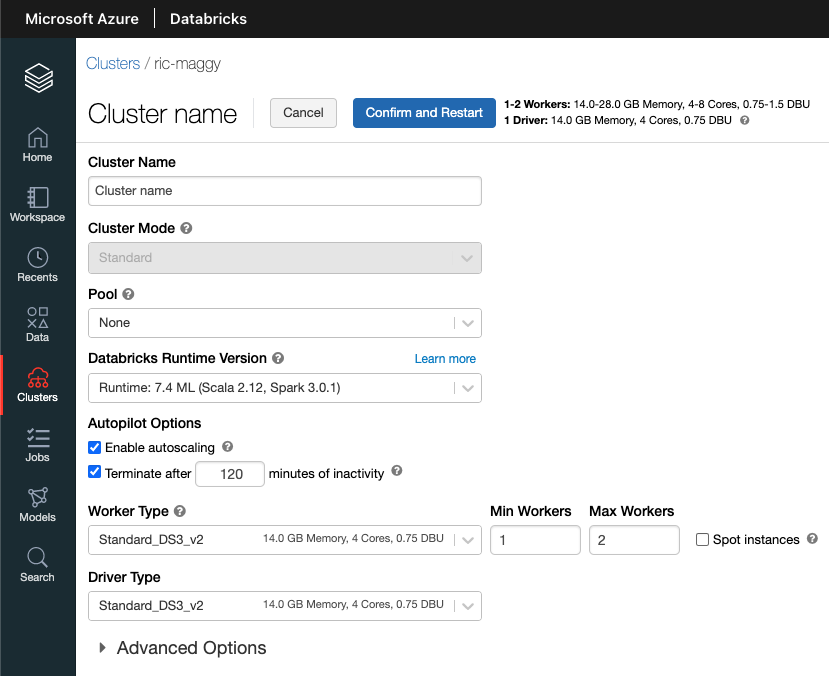
If you don't know how to create a cluster, please follow the tutorial. If it is your first time on Databricks, make sure to get familiar with the platform and prices.
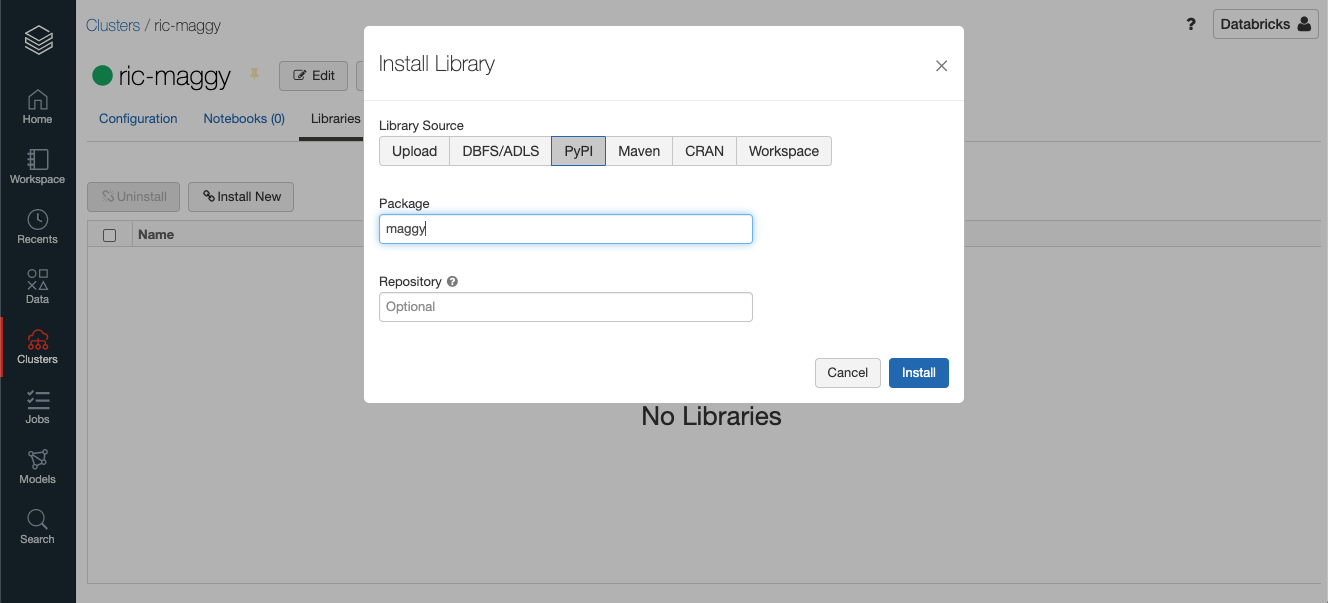
Once you created the cluster, you have to install Maggy. In order to do this, just navigate to your cluster and click Libraries, then click on Install New and PyPi, write 'maggy' as Package and Install.
Once you have installed Maggy, do the same thing with TensorFlow version 2.4 or higher. For example, on the Package field you can write 'tensorflow==2.4'.
Now we can open the Databricks notebook and write our first Maggy program.
Maggy workflow
In order to use Maggy on your workflow, we need to do the following:
- Create classes and functions to (a) create your model, (b) create your dataset, and (c) define your model training logic.
- Pass the dataset or the dataset path, the data processing function and the hyperparameters to the configuration function of Maggy.
- Call the 'lagom' function of Maggy passing the training function and the configuration from the previous step.
We are now going to present an example on how to implement this workflow. We are going to distribute the training of a (very) simple machine learning model on the iris dataset.
1a. Model creation
First of all, we have to wrap our ML model in a class, the class has to be an implementation of tf.keras.Model.
It's important to note that we are not instantiating the class, we need to pass the class to Maggy, not an instance of it.
In this example we define a class called NeuralNetwork. It is a superclass of tf.keras.Sequential, an implementation of tf.keras.Model. Make sure that your class implements tf.keras.Model. Finally, we define our ML model in the init function.
1b. Dataset creation
First, we need to upload the Iris dataset on Databricks, on your databricks platform, click on Data on the sidebar and then Create Table, and upload Iris.csv that can be downloaded here.
In order to use Maggy, we have to pass the training set, test set and optionally a function for data processing to the configuration file.
The training and test sets can be:
- A tuple like train_set = (X_train, y_train). X_train and y_train can be a list, a numpy array or a TensorFlow dataset.
- The path to the training and test sets. In this case, you also need to provide a data process function containing the instructions to consume and transform the data, as per the following code snippet.
1c. Create an HPO function
We now wrap the code containing the logics of your experiment in a function.
For HPO, we have to define a function that has the HPs to be optimized as parameters. Inside the function we simply put the training logic as we were training our model in a single machine using Tensorflow. Maggy will run this function multiple times using different parameters for you, as we will see in section 3a.
1d. Create an oblivious training function
The training function provides the instruction to run the training and evaluation of your model, given the data passed in the configuration. You just need to wrap the instructions you implemented and eventual hyperparameters (for example the values to pass in the model constructor). The training function has to return a value or a list of values that corresponds to the evaluation results.
It's important to note that in the HPO function we did not pass the model as a parameter while we did that in our oblivious training function. This is because, when using Maggy for distributed training, the library has to patch some functions of the model class.
2a. Configure Maggy for HPO
The next step is to create a configuration instance for Maggy. Since in this example we are using Maggy for hyperparameter optimization and distributed training using TensorFlow, we will use OptimizationConfig and TfDistributedConfig.
OptimizationConfig contains the information about the hyperparameter optimization.
We need to define a Searchspace class that contains the hyperparameters we want to optimize. In this example we want to search for the optimal number of layers of the neural network from 2 to 8 layers.
OptimizationConfig contains the following parameters:
- num_trials: Controls how many separate runs are conducted during the hp search.
- optimizer: Optimizer type for searching the hp searchspace.
- searchspace: A Searchspace object configuring the names, types and ranges of hps.
- optimization_key: Name of the metric to use for hp search evaluation.
- direction: Direction of optimization.
- es_interval: Early stopping polling frequency during an experiment run.
- es_min: Minimum number of experiments to conduct before starting the early stopping mechanism. Useful to establish a baseline for performance estimates.
- es_policy: Early stopping policy which formulates a rule for triggering aborts.
- name: Experiment name.
- description: A description of the experiment.
- hb_interval: Heartbeat interval with which the server is polling.
2b. Run distributed HPO
Our HPO function and configuration class are now ready, so we can go on and run the HPO experiment. In order to do that, we run the lagom function, passing our training function and the configuration object we instantiated during the last step.
If you are wondering what lagom means, Lagom is a swedish word representing some cultural aspects of balance and equilibrium, in english could be translated as "just the right amount" or "less is more".
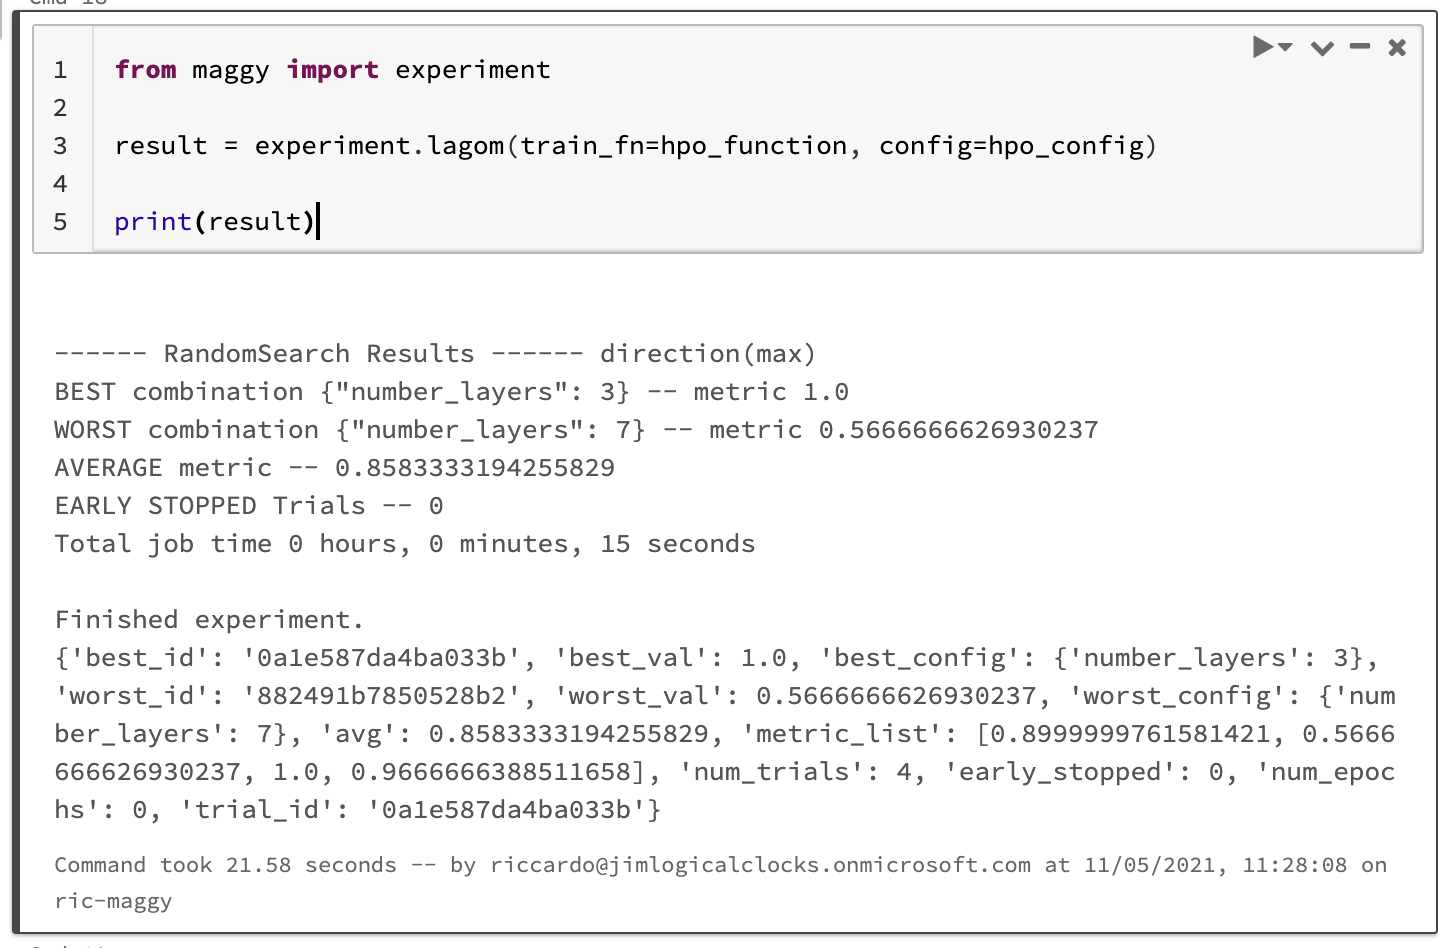
This function will print the HPO summary. As you can see, there are several values returned, we are most interested in the 'best_config' dictionary, it contains the parameters for which the model performed the best.
3a. Configure distributed training
Now it's time to run the final step of our ML program. Let's initialize the configuration class for the distributed training. First, we need to define our hyperparameters, we want to take the best hyperparameters from the HPO.
TfDistributedConfig class has the following parameters:
- name: the name of the experiment.
- module: the model to be trained (defined in the first step of this guideline).
- train_set: the train set as a tuple (x_train, y_train) or the train set path.
- test_set: the test set as a tuple (x_test, y_test) or the test set path.
- process_data: the function to process the data (if needed).
hparams: the model and dataset parameters. In this case we also need to provide the 'train_batch_size' and the 'test_batch_size', these values represent the subset sizes of the sharded dataset. It's value is usually the dataset_size/number_workers but can change depending on your needs.
3b. Run distributed training
Finally, let's run the distributed training using the lagom function.
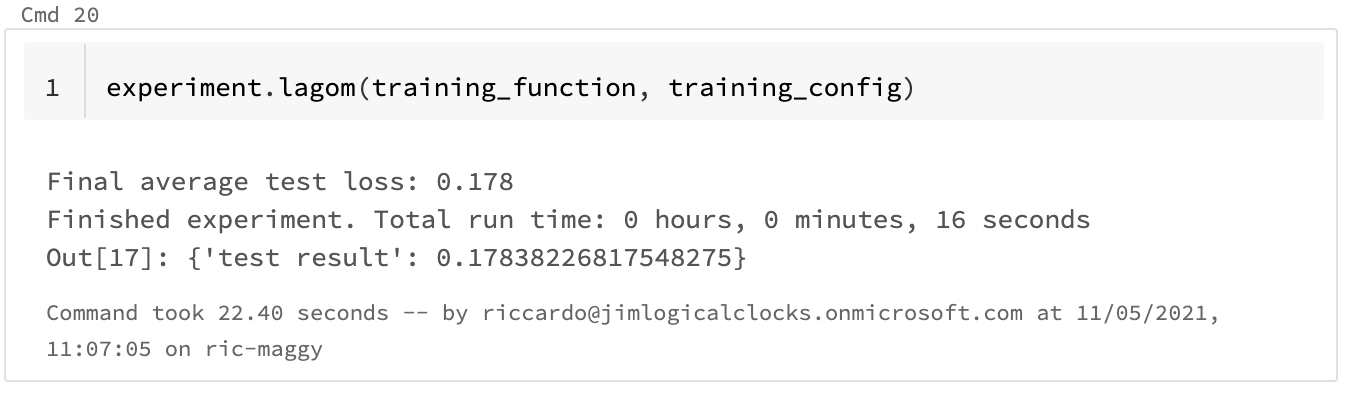
Maggy will run the distributed training using the number of workers and resources available to the cluster defined. Finally, it will prompt the test results. The training log can be found in the Spark UI on Databricks.
Try it now!
Maggy is open-source and everyone can contribute to the project. Feel free to experiment with the library and contact us for any questions or issues. You can reach out to us via GitHub or the hopsworks community. You can also give us a star on GitHub to let us know you appreciate our work.
Conclusion
In this article we saw how to train a ML model in a distributed fashion without reformatting our code, thanks to Maggy. Maggy is available on Hopsworks. If you want to know more about how to develop your ML projects faster, you may want to check out our previous blog on ML experiments with Hopsworks.