How to Build a Python Environment with Custom Docker Commands
Track Python Environment History in Hopsworks
With the latest version of Hopsworks we introduce new capabilities such as running custom bash commands and a improved UI which shows you the history of the python environment.

## Introduction In Hopsworks 3.4 we have introduced new capabilities to assist in managing the Python environment: 1. Running custom bash commands that can be used to install Linux/OS-level packages and add more complex configurations for your environment e.g, configuring an oracle database. 2. Show the history of the python environment i.e., which libraries were installed at each creation of the new environment. The Hopsworks installation ships with a Miniconda environment that comes preinstalled with the most popular libraries you can find in a data scientist toolkit, including TensorFlow, PyTorch and scikit-learn. The environment is managed using the Hopsworks Python service to install libraries which may then be used in Jupyter notebooks or the Jobs service in the platform. Some Python libraries require the installation of some OS-Level libraries. In some cases, you may need to add more complex configuration to your environment. This requires writing your own commands and executing them on top of the existing environment. The Python environment is shared by different members of the project. When a member of the project introduces a change to the environment i.e., installs/uninstalls a library, a new environment is created and it becomes the de facto environment for everyone in the project. It is therefore important to track how the environment has been changing over time i.e., what libraries were installed, uninstalled, upgraded, or downgraded when the environment was created and who introduced the changes. In this blog post, we will describe how you can run custom commands to install OS-Level packages or add extra configuration to the Python environment in Hopsworks. Furthermore, we will show how you can track the changes of your Python environment. ## Prerequisite To follow this tutorial you should have an instance of Hopsworks version 3.4 or above. ## Running custom commands In this section, we will see how you can run custom bash commands in Hopsworks to configure your Python environment. In Hopsworks, we maintain a docker image built on top of Ubuntu Linux distribution. You can run generic bash commands on top of the project environment from the UI or REST API. 1. **Setting up the bash script and artifacts from the UI** To use the UI, navigate to the Python environment in the Project settings. In the Python environment page, navigate to custom commands. From the UI, you can write the bash commands in the textbox provided. These bash commands will be uploaded and executed when building your new environment. You can include build artifacts e.g., binaries that you would like to execute or include when building the environment. 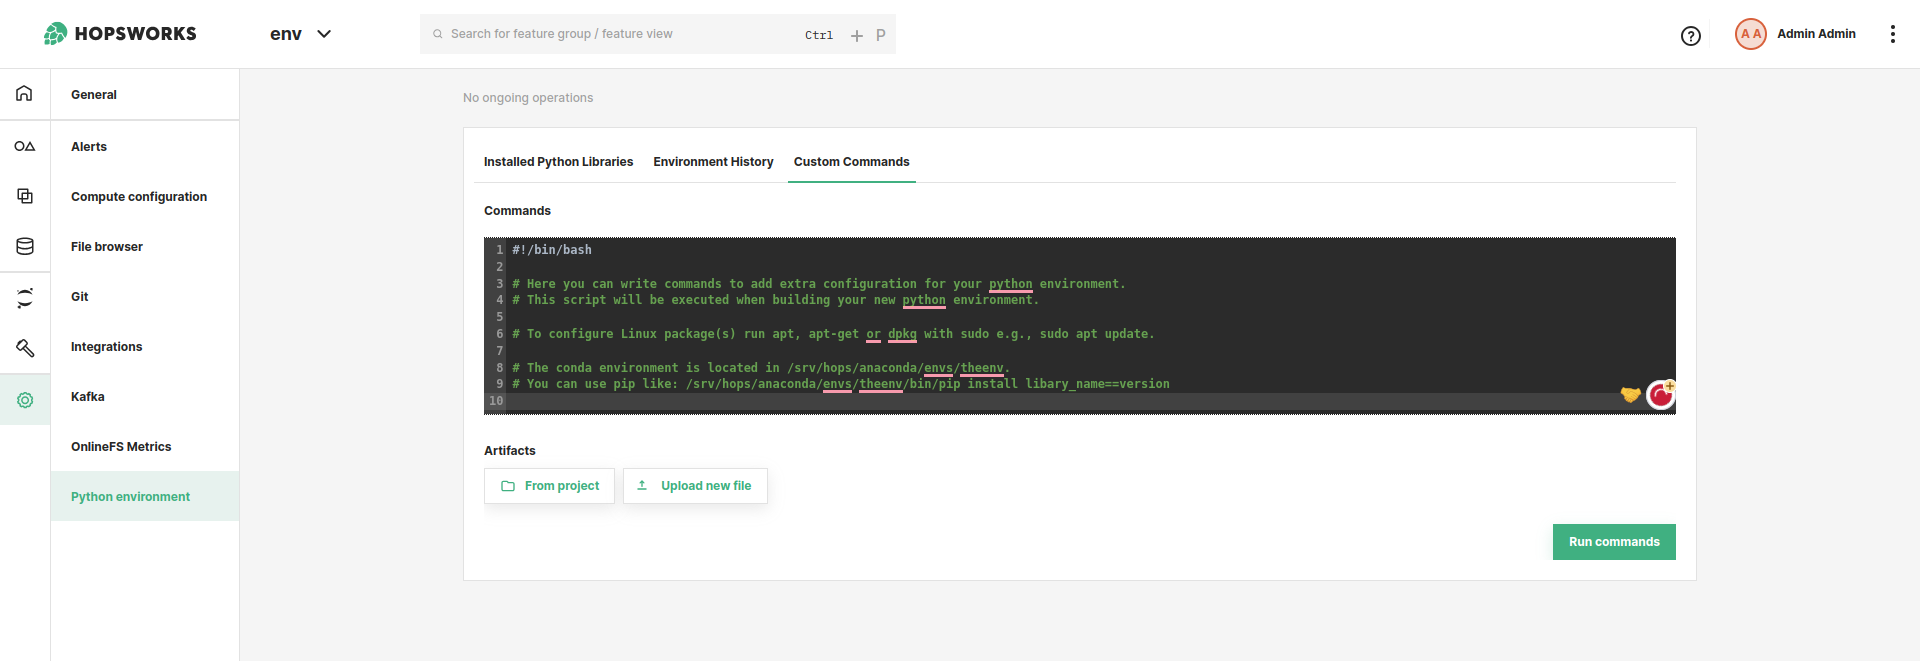 **_Figure 1:_** _Provide script and artifacts for custom commands._ 2. **Setting up the bash script and artifacts from the REST API** From the REST API, you should provide the path, in HopsFS, to the bash script and the artifacts. Thus, you should upload the artifacts to the Hopsworks filesystem - HopsFS. The REST API endpoint for running custom commands is: _hopsworks-api/api/project//python/environments//commands/custom_ and the POST request body should look like this: ## Example Bash Script Now let’s see an example of how you can install a Linux package, install a Python package, and use artifacts that you included in the commands file that you provide. The bash script below shows how you can install OS-Level packages, and use the artifacts included during the build. 1. #!/bin/bash 2. sudo apt-get install net-tools 3. ls /srv/hops/build/ 4. tar -xvf /srv/hops/build/files.tgz /tmp 5. /srv/hops/anaconda/envs/theenv/bin/pip install spotify==0.10.2 Now let’s look at what each command in the script does. 1. The first line of your bash script should always be #!/bin/bash (known as shebang) so that the script can be interpreted and executed using the Bash shell. 2. We are installing the net-tools package. You can use apt, apt-get and deb commands to install packages. You should always run these commands with sudo. In some cases, these commands will ask for user input, therefore you should provide the input of what the command expects, e.g., sudo apt -y install, otherwise the build will fail. We have already configured apt-get to be non-interactive 3. The build artifacts will be copied to srv/hops/build. You can use them in your script via this path. This path is also available via the environmental variable BUILD\_PATH. If you want to use many artifacts it is advisable to create a zip file and upload it to HopsFS in one of your project datasets. You can then include the zip file as one of the artifacts. 4. In your bash script, you can include a command to extract the zip file. If you have the files on a remote server you can use a download tool like wget in your bashscript. 5. The conda environment is located in /srv/hops/anaconda/envs/theenv. To install or uninstall packages within this conda environment, you can follow the example step. If the command requires user input, please include the command along with the expected input to prevent build failures. ## Python Environment The Python environment evolves over time as libraries are installed, uninstalled, upgraded, and downgraded. To help you keep track of these changes, you can now access the Python environment history via the UI. This feature allows you to review the specific changes made when each new environment iteration. Hopsworks retains a versioned YAML file for each environment, enabling you to revert to an earlier environment if necessary. To compare the changes between environments, simply click the button shown in figure 2. This will display the differences between the current environment and the previous one from which it was derived. 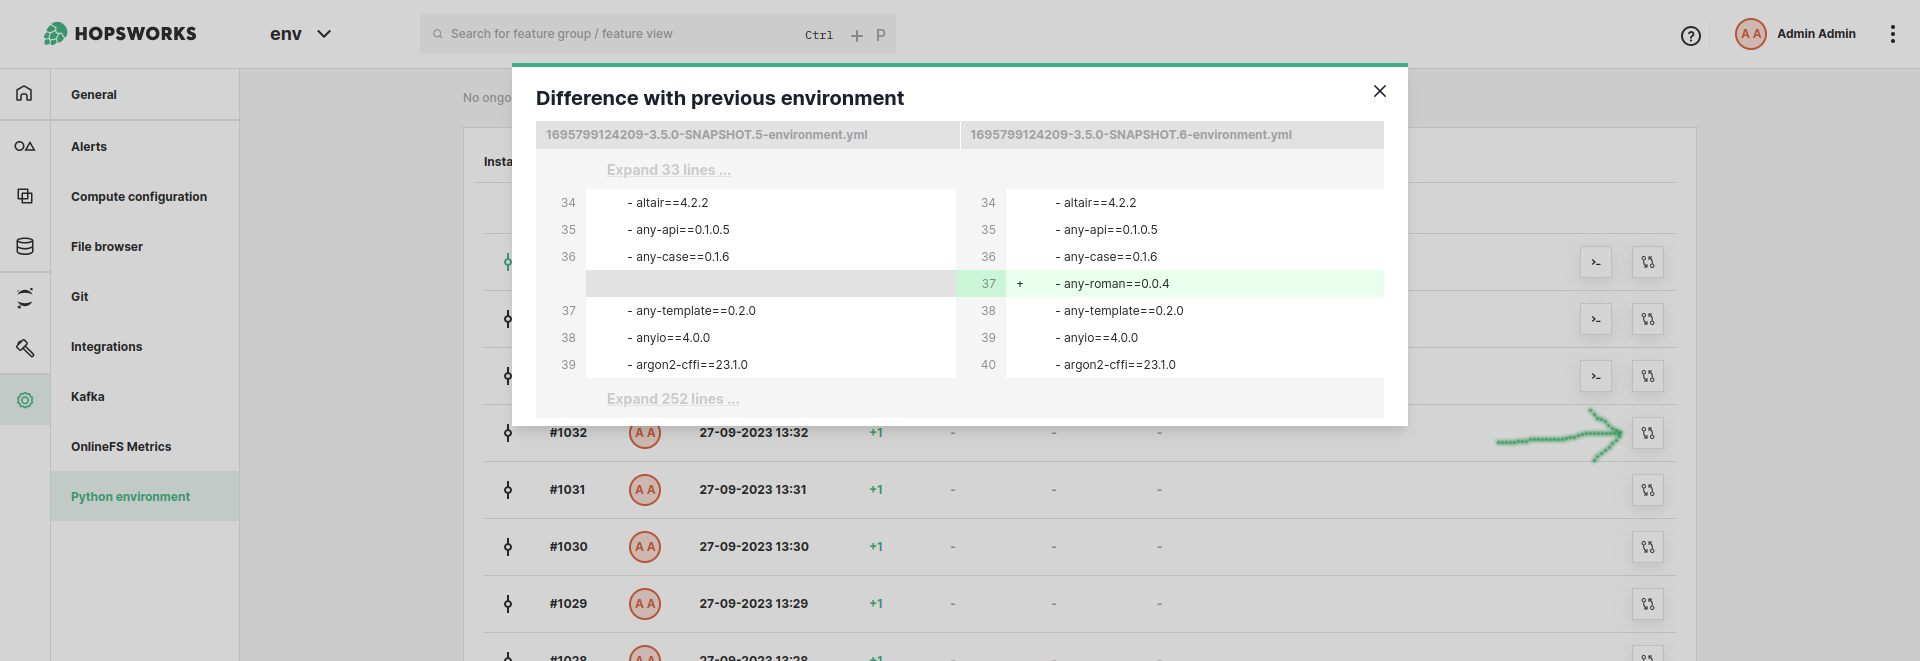 **_Figure 2:_** _View difference between environments_ As we can see in Figure 3, you can review custom commands for the environment in the UI, if the environment was built using custom commands. 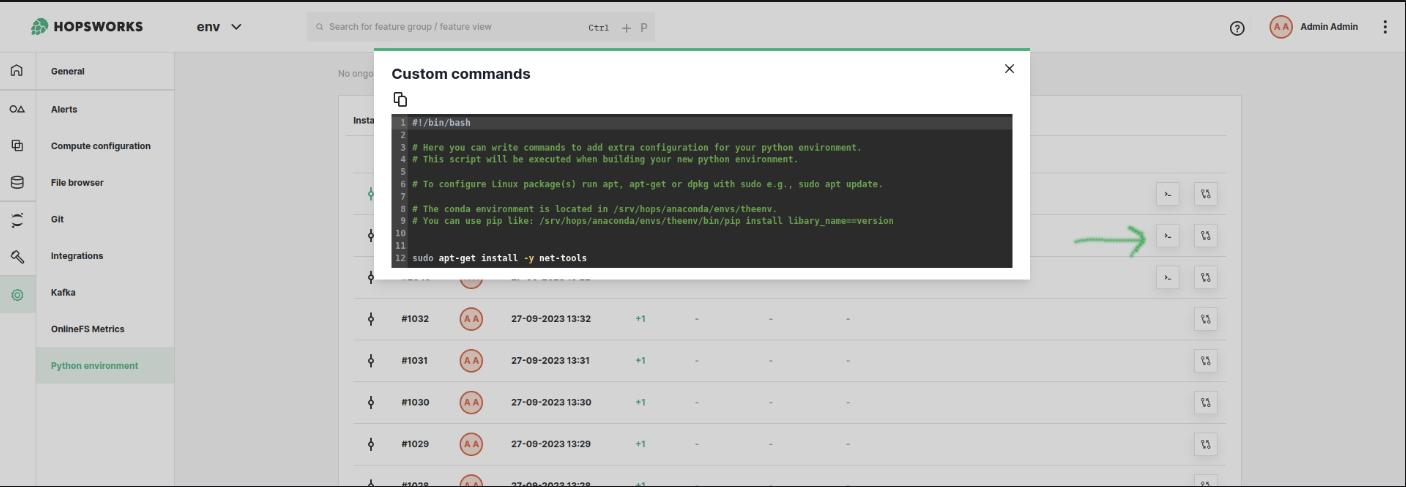 **_Figure 3:_** _Review custom commands details from history._ ## Summary In this article, we have shown how you can write and execute custom commands to add more sophisticated configurations to your Python environment. We have also shown how you can track the Python changes made to your environment in the UI.