How to engineer and use Features in Azure ML Studio with the Hopsworks Feature Store
Learn how to design and ingest features, browse existing features, create training datasets as DataFrames or as files on Azure Blob storage.

Introduction
Azure ML is becoming an increasingly popular data science platform to train, deploy, and manage machine learning models. Azure ML also supports AutoML, and enables you to automate and run pipelines at scale.
The Hopsworks Feature Store is the leading open-source feature store for machine learning. It is provided as a managed service on Azure (and AWS) and it includes all the tools needed to store, retrieve and track features that will be used when training and serving ML models. The Hopsworks Feature Store integrates with many cloud platforms and storage services, one of which is Azure ML Studio.
In this blog post, we show how you can connect to the Hopsworks Feature Store from Azure ML, how to ingest features from a Pandas dataframe, combine different features in order to create a training dataset, and finally save that training dataset to Azure Blob storage, from where the data can be read in Azure ML to train and validate a machine learning model.
Prerequisites
In order to follow this tutorial, you need:
- Hopsworks Feature Store running on Hopsworks. You can register for free with no credit-card and receive 300 USD of credits to get started. You can deploy a feature store in either your own Azure account or even in an AWS account.
- Users should also have an existing ML Studio notebook with an attached compute cluster. If you don't have an existing notebook, you can create one by following the Azure ML documentation.
- If you want to follow this tutorial with the same data, make sure to upload these files to your ML Studio environment.
- A project created within Hopsworks. If you don’t have one yet, you can simply follow the Feature Store tour that creates a sample project for you.
Step 1: Configure a Hopsworks API Key
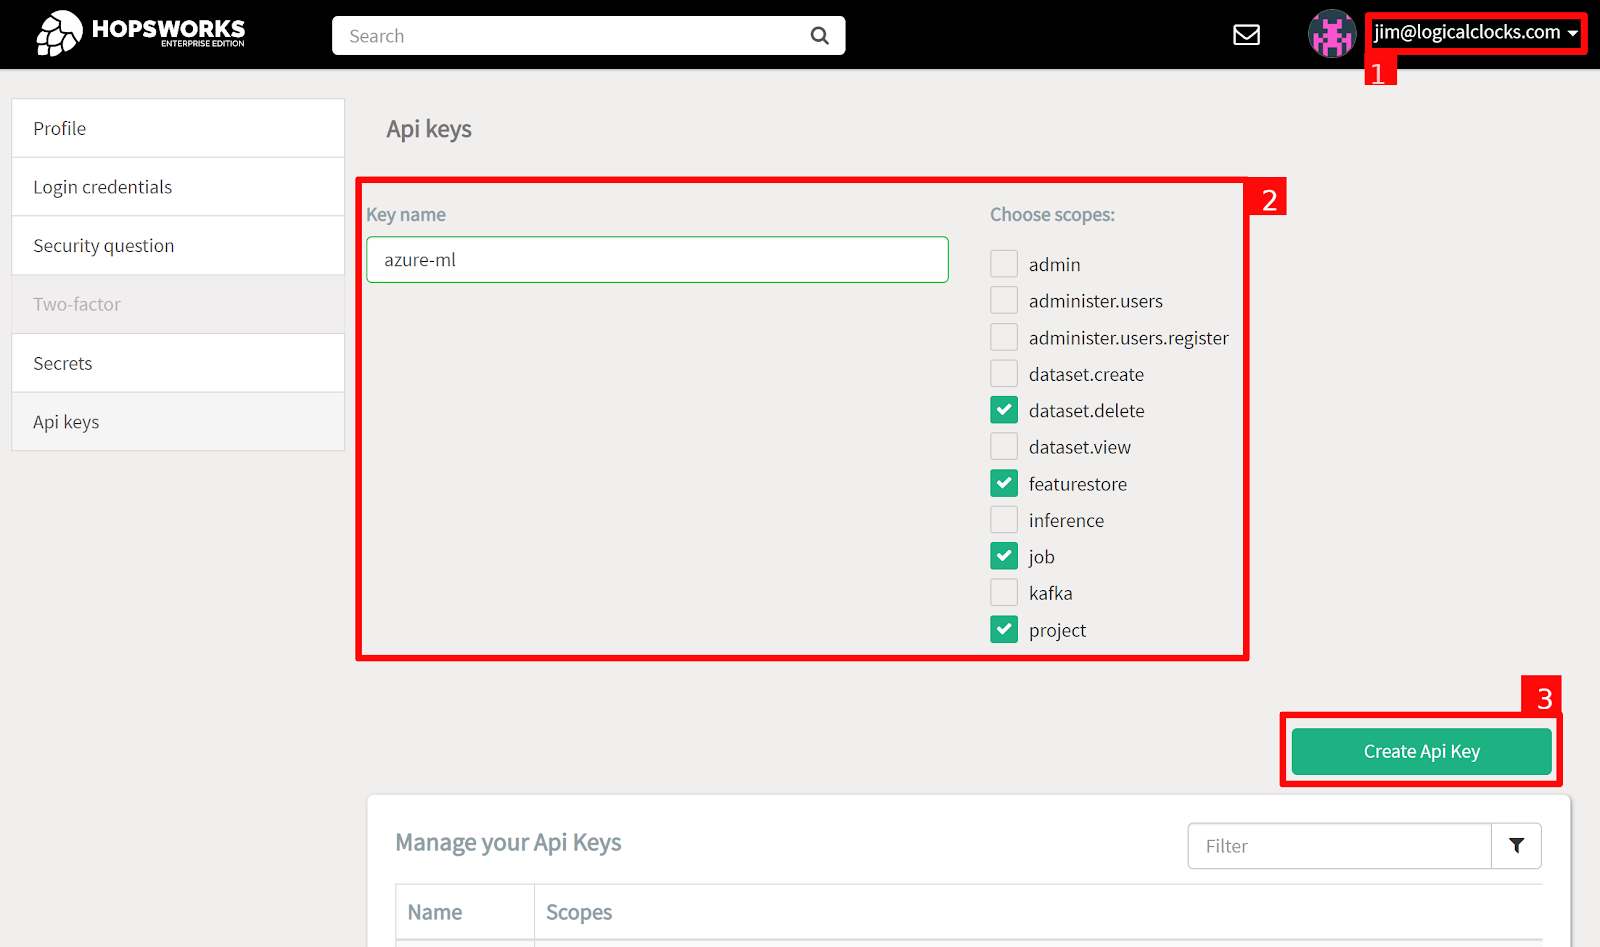
Connecting to the Feature Store from Azure ML requires setting up a Feature Store API key for authentication. In Hopsworks, click on your username in the top-right corner (1) and select Settings to open the user settings. Select API keys. (2) Give the key a name and select the job, featurestore, dataset.create and project scopes before (3) creating the key. Copy the key into your clipboard for the next step.
Step 2: Connect from an Azure Machine Learning Notebook
To access the Feature Store from Azure Machine Learning, open a Python notebook and proceed with the following steps to install the Hopsworks Feature Store client called HSFS:
Note that we are installing the latest version at the time of writing this (2.1.4) - you should always install the latest minor version that corresponds to the version of your Hopsworks Feature Store. So in this case our Hopsworks instance is running version 2.1.
Furthermore, for Python clients (such as Azure ML), it is important to install HSFS with the `[hive]` optional extra. Spark clients do not need this.

After successfully installing HSFS, you should be able to connect to the Feature Store from your Azure ML notebook (note: you might need to restart the kernel, if you had HSFS previously installed):
Make sure to replace the [UUID] with the one of the DNS of your Hopsworks instance, the [project-name] with the Hopsworks project that contains your feature store. And the [api-key] with the key created in Step 1. Please note that it’s not good practice to store the Api Key in your notebook- instead you should store the key safely in a permissions protected file and use the “api_key_file” argument to pass the filename to the connection method.
Once you are connected you can get a handle to the feature store with `connection.get_feature_store()`. If the project you have connected to also contains a shared feature store (it is possible to have a feature store from another project shared with the project you are using), you can also get a handle on the shared feature store using the connection object.
Step 3: Ingest data from a Pandas dataframe to the Feature Store
You can simply upload some data in your favourite file format to the Azure ML workspace or you configure a Hopsworks Storage Connector to cloud storage or a database. The Storage Connector safely stores endpoints and credentials to external stores or databases, making it easier for Data Scientists to retrieve data from them.

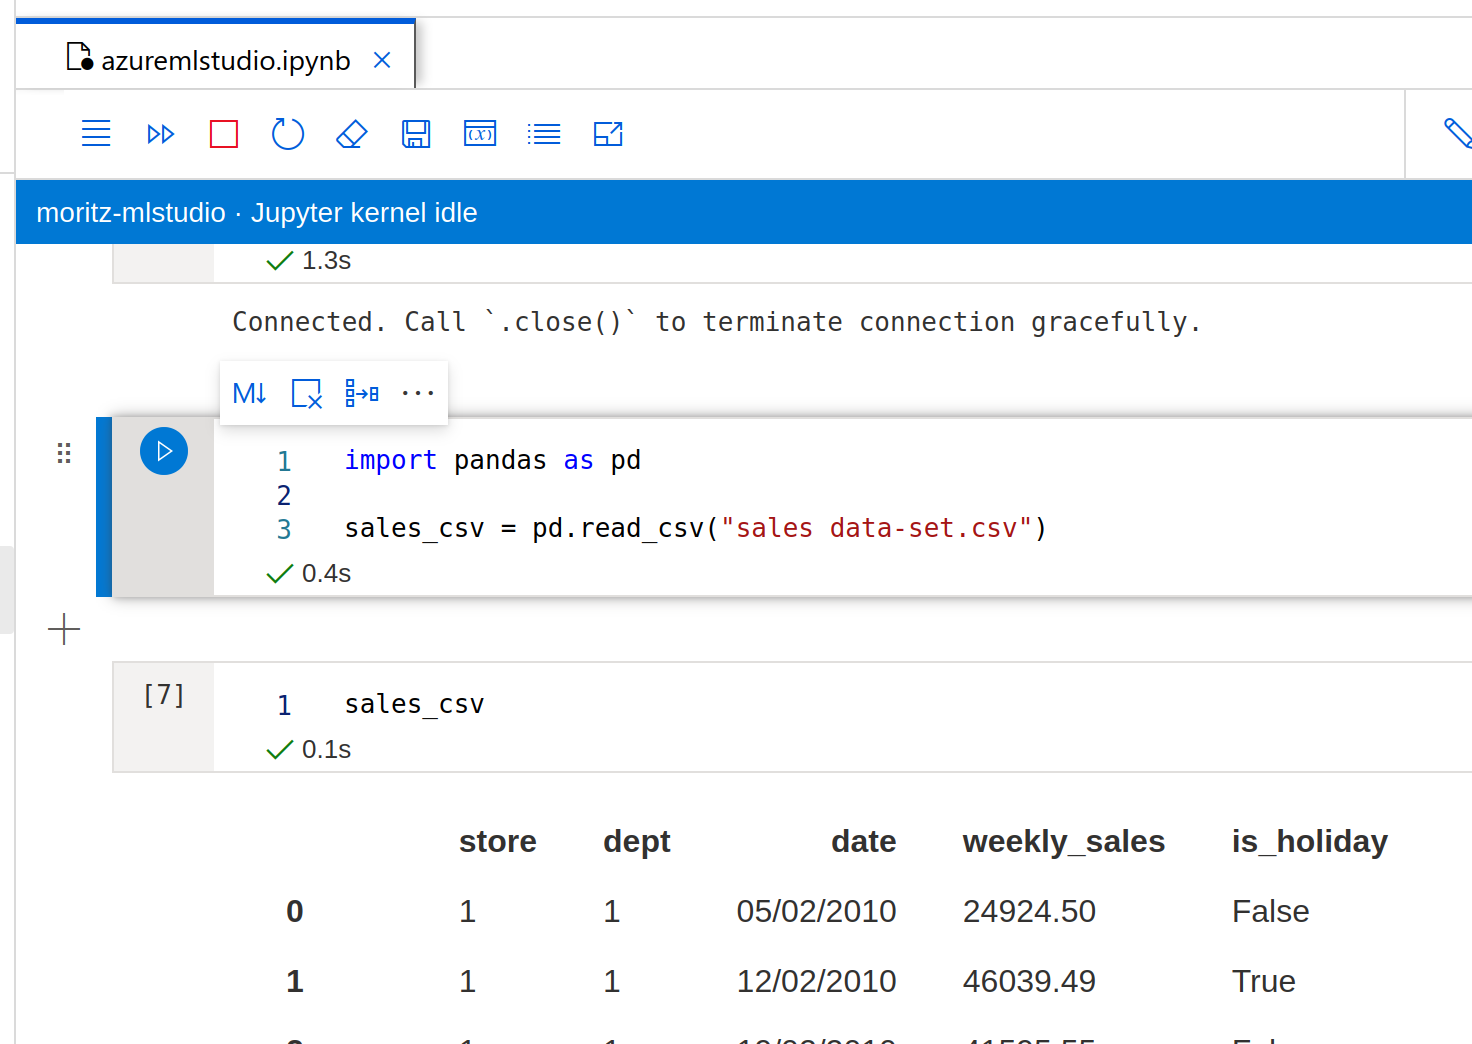
If you opted to upload the data as CSV files, as shown below, simply read it into a pandas dataframe:
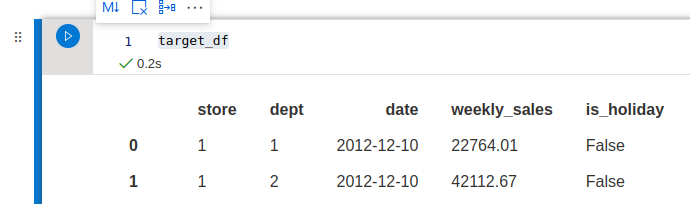
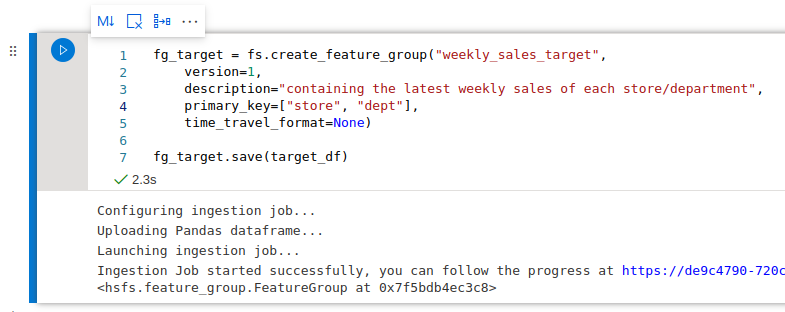
Now, we can perform some feature engineering based on the pandas dataframe. We would like to predict the weekly sales of a department, so let’s create our target feature by selecting the last week available for each department:We can create this as a feature group, also containing the `is_holiday` feature, since, this information will be available at prediction time, there is no risk of data leakage.
We can create this as a feature group, also containing the `is_holiday` feature, since, this information will be available at prediction time, there is no risk of data leakage.
We can create this as a feature group, also containing the `is_holiday` feature, since, this information will be available at prediction time, there is no risk of data leakage.
By clicking the hyperlink in the logs underneath the notebook cell, you can follow the progress of your ingestion job in Hopsworks.
Let’s now create a few simple features based on the historical sales of each department:
And again, we finish by creating a feature group with this dataframe and saving it to the feature store:
Note: If you have existing feature engineering notebooks that you would like to reuse with the Hopsworks Feature Store, it should be enough to simply add the two calls (create the Feature Group, and save the dataframe to it) in order to ingest your features to the Feature Store. No other changes are required in your existing programs and you can still use your favourite Python libraries for feature engineering.
With these two feature groups we can move to the next step to create a training dataset. Since we did not disable statistics computation, you can head to the Hopsworks Feature Store and inspect the pre-computed statistics over the newly created feature groups.
Step 4: Create a training dataset in your favorite file format using the Feature Store
HSFS comes with an expressive Join API and Query Planner that allows users to join, filter and explore feature groups in order to create training datasets.
Assuming, you start with a new Jupyter Notebook, the first commands you need to run are to get handles to the previously created feature groups:
Note that we explicitly supply the (schema) version for the feature group (version=1), so that other developers can update the feature groups safely in higher numbered versions of the feature group.
With our two feature group objects, we would like to join the target feature with our historical features, but only select the departments for our training dataset that have a full history of 142 weeks available:
As you can see, feature group joins work similarly to pandas dataframe joins. In this case we can omit the join-key since both feature groups have the same primary key, however, for more advanced joins there is always the possibility to specify the join key from each group as well as the join type (left, inner, right, outer, etc) manually.
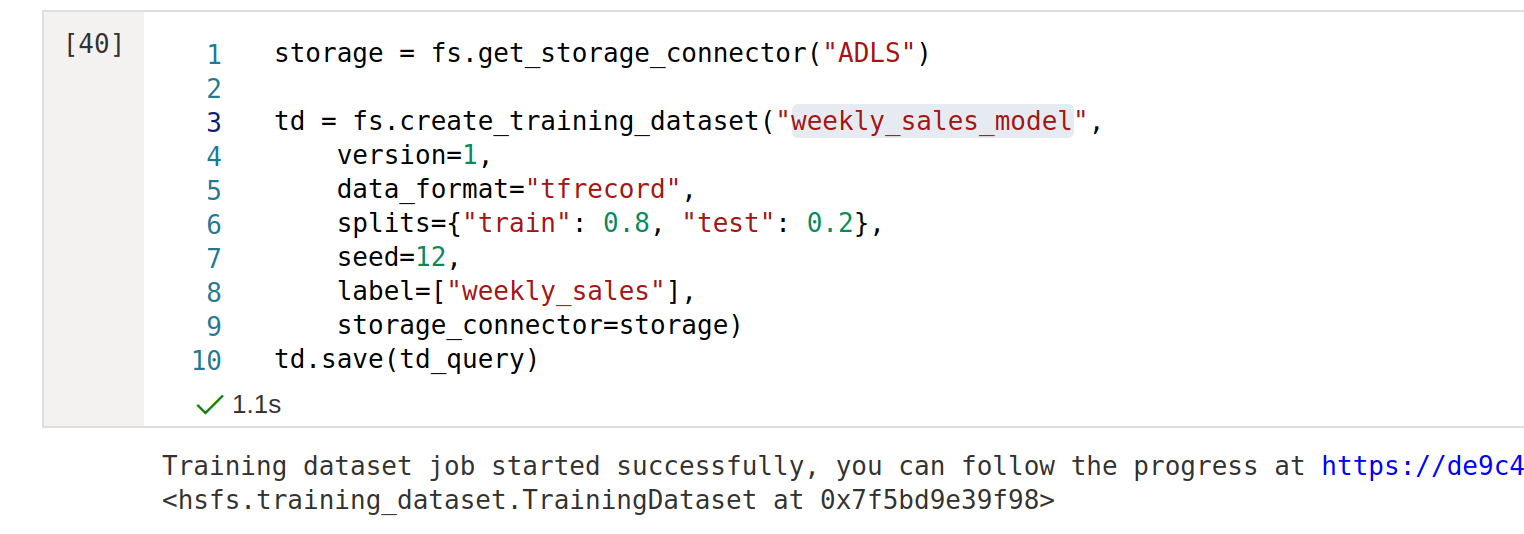
Hopsworks Feature Store supports a variety of data sources to materialize your training dataset to different cloud storage systems. If you have previously configured an Azure Data Lake Storage connector, you can now use it as the destination for your training dataset:
Similar to feature groups, you can now create the training dataset in your favourite file format, matching the machine learning library you are planning to use - for example, choose ‘tfrecord’ for TensorFlow. The Feature Store will make sure to track all metadata related to your training dataset, even if the training dataset is created outside of Hopsworks.
To retrieve the training dataset in your training environment you can simply get a handle to the dataset and its location, to pass it subsequently to your reader utilities:
Get Started
This tutorial is available as a Jupyter Notebook in our GitHub repository. For more information, visit documentation.